Stamped Concrete
Adding color and texture to your landscape!
Stamped concrete is a great way to add style and decor to your home or commercial property. There are many patterns to choose from and a multiude of color variations which you can combine to add an impressive style to your landscape which will surely wow your guests.
Stamped concrete is ideal for driveways, swimming pool decks, foot paths, patios, as well as interior floors, and countertops.
Let's look deeper
How is stamped concrete done?
The finishing of stamped concrete is quite an intricate process involving a few steps, and an eye for detail.
 Firstly, after the ground base is prepared and the reinforcing (rebar) steel and forms are in place, the concrete is placed in the same way as any concrete job; by placing, screeding, and troweling the concrete to a smooth finish.
If need be instruments such as lazer levels are used to ensure the grade of the base, otherwise height pegs and an expereicend crew can get the job done.
 Secondly, a colored release powder is then dusted onto the concretes surface by hand or by using a tampico brush.
The powder release serves 2 purposes; to keep the stamp mats from sticking to the concrete and to create a secondary color tone to the base color tone (used in the concrete mix), which will stick into the deeper grooves of the stamp pattern giving the over all appearance of shadows and highlight the 3rd dimensions.
Alternatively, a liquid release can be used for this purpose, which is more suitable in enclosed areas, such as sauna and jacuzzi rooms.
The third step is where expertise comes into play.
Before a crew can place the rubber stamp mats onto the concrete, we need to make sure the timing is right, as to not leave too deep of an impression or too light of an impression in the concrete. Different factors can determine when is the perfect time to place the mats and begin the stamping process such as, the weather conditions, the slump of the concrete which it had been poured with being the most important factors. After years of experience a qualified crew will know when the time is right.
 Borders around the perimeter edges of the area or up against walls are first stamped lightly using a seemless skin mat which is a replicate of a stone grooved texture with no detailed pattern.
After the edges are done and when the time is right to proceed, the larger polyurethane stamp pattered mats are then lined up in a row and placed onto the concrete surface.
 The finishing crew then walks onto the mats and lightly tamps the pattern into the concrete surface using their body weight and a rubber based hand tamper.
As the concrete stamp mats are usually (depending on the pattern) not perfectly square in shape, the mats are then placed and impressed into the concrete in a jig-saw, interlocking type fashion from the beggining point to the end.
To note, when taking on the stamping process, the start point will always begin in the open areas which have full exposure to the sun and heat and will finish in the areas covered in shade from overhead trees or buildings blocking the sun from the concrete surface (if there are any). It is done this way as the concrete will be setting up more quickly in the open areas, and more slowly in the shaded areas, allowing the crew to leave a good detailed impression in the concrete surface.
 The final step is to pressure wash and seal the concrete surface. A time span of 2 - 5 days is given to leave the powder release on before pressure washing it off, to allow the release powder time to cure into the concrete a little.
After the release is washed off, a coating of clear liquid concrete sealer is then applied by spay and roller to the concrete surface.
You will be amazed as the color of concrete deepens and becomes much more vibrant after the sealer has been applied!
Generally, the sealer does not make the concrete surface very slippery, however in areas such as pool deck and steep slopes, we add a secondary product to the concrete sealer to give the concrete surface some grit which will allow more traction.
Job Complete! Allow 5 days before driving a vehicle or heavy equipment onto your new stamped concrete! Walking is fine! Enjoy!
Which Stamp Patterns are Available?
There are many stamp patterns available, however the most common patterns are:
Ashlar Slate, Large Ashlar Slate, Grand Ashlar Slate

Random Stone

London Cobble Stone, European Fan, Brick Herringbone
Square Tile (Large and Small)
The general rule of thumb when choosing a stamp pattern is; larger patterns to be used in larger wide open areas and smaller patterns to be used in smaller confined areas.
The reason for this is, if you were to use a smaller pattern on a large coverage area there would be too much detail and have a busy look to it. Conversely, using a larger stamp mat pattern on a smaller area (such as 3 foot wide sidewalk or smaller patio's) would not have enough detail to create an ambience.
Which Concrete Colors are Available?
There are over 60 different shades of color pigments which can be added to the concrete. the most popular being a slate grey, or a light brown. To note: The darker the shade which you choose, the more expensive the cost will be for the concrete mix. The reason is more pigment is used. If you select the lighter tones, which are closer to the tone of the concrete mix, the cost will be less.

Which Powder Release Colors are Available?
There are many concrete powder pigment releases available. Just as with interior decorating, the rule of thumb is to select a release color which is in the same color family as the color used for the concrete mix, a shade or two darker. If you are more adventurous, we can use 2 or 3 different shades of release to create a marble type of effect with the color tones.

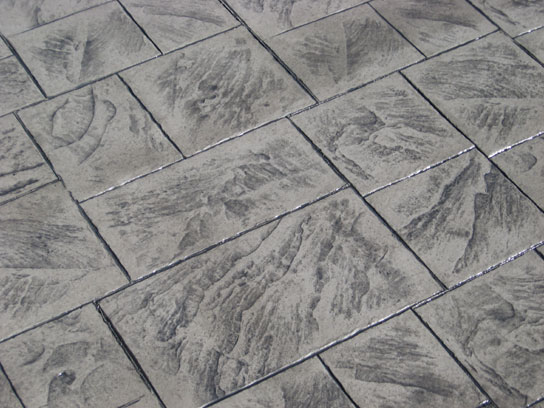
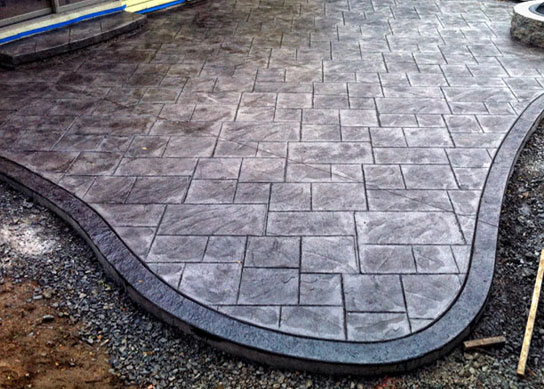
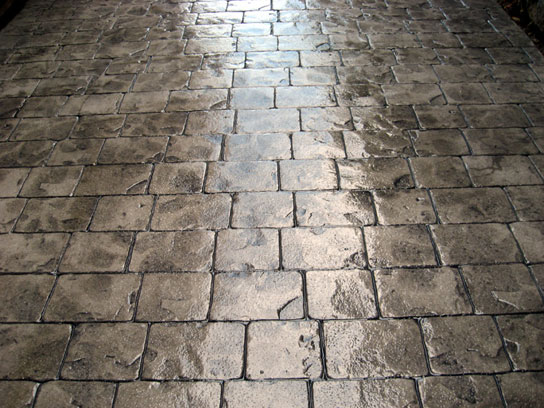
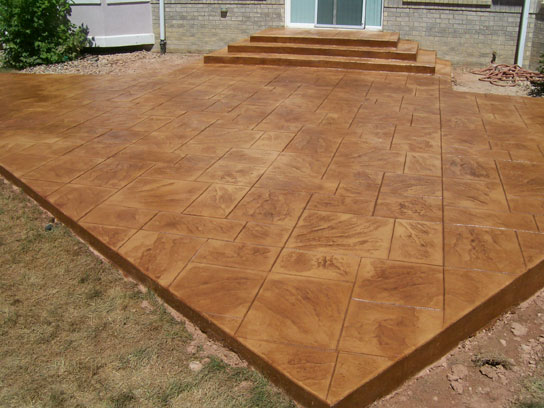
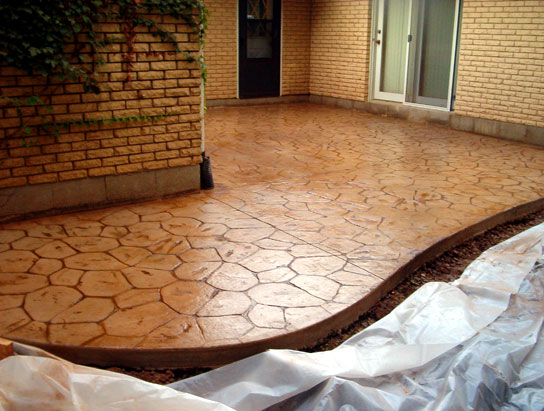
Some Samples of our Stamped Concrete Work

[ top of page ]
Stamped concrete is ideal for driveways, swimming pool decks, foot paths, patios, as well as interior floors, and countertops.
Let's look deeper
How is stamped concrete done?
The finishing of stamped concrete is quite an intricate process involving a few steps, and an eye for detail.
 Firstly, after the ground base is prepared and the reinforcing (rebar) steel and forms are in place, the concrete is placed in the same way as any concrete job; by placing, screeding, and troweling the concrete to a smooth finish.
If need be instruments such as lazer levels are used to ensure the grade of the base, otherwise height pegs and an expereicend crew can get the job done.
 Secondly, a colored release powder is then dusted onto the concretes surface by hand or by using a tampico brush.
The powder release serves 2 purposes; to keep the stamp mats from sticking to the concrete and to create a secondary color tone to the base color tone (used in the concrete mix), which will stick into the deeper grooves of the stamp pattern giving the over all appearance of shadows and highlight the 3rd dimensions.
Alternatively, a liquid release can be used for this purpose, which is more suitable in enclosed areas, such as sauna and jacuzzi rooms.
The third step is where expertise comes into play.
Before a crew can place the rubber stamp mats onto the concrete, we need to make sure the timing is right, as to not leave too deep of an impression or too light of an impression in the concrete. Different factors can determine when is the perfect time to place the mats and begin the stamping process such as, the weather conditions, the slump of the concrete which it had been poured with being the most important factors. After years of experience a qualified crew will know when the time is right.
 Borders around the perimeter edges of the area or up against walls are first stamped lightly using a seemless skin mat which is a replicate of a stone grooved texture with no detailed pattern.
After the edges are done and when the time is right to proceed, the larger polyurethane stamp pattered mats are then lined up in a row and placed onto the concrete surface.
 The finishing crew then walks onto the mats and lightly tamps the pattern into the concrete surface using their body weight and a rubber based hand tamper.
As the concrete stamp mats are usually (depending on the pattern) not perfectly square in shape, the mats are then placed and impressed into the concrete in a jig-saw, interlocking type fashion from the beggining point to the end.
To note, when taking on the stamping process, the start point will always begin in the open areas which have full exposure to the sun and heat and will finish in the areas covered in shade from overhead trees or buildings blocking the sun from the concrete surface (if there are any). It is done this way as the concrete will be setting up more quickly in the open areas, and more slowly in the shaded areas, allowing the crew to leave a good detailed impression in the concrete surface.
 The final step is to pressure wash and seal the concrete surface. A time span of 2 - 5 days is given to leave the powder release on before pressure washing it off, to allow the release powder time to cure into the concrete a little.
After the release is washed off, a coating of clear liquid concrete sealer is then applied by spay and roller to the concrete surface.
You will be amazed as the color of concrete deepens and becomes much more vibrant after the sealer has been applied!
Generally, the sealer does not make the concrete surface very slippery, however in areas such as pool deck and steep slopes, we add a secondary product to the concrete sealer to give the concrete surface some grit which will allow more traction.
Job Complete! Allow 5 days before driving a vehicle or heavy equipment onto your new stamped concrete! Walking is fine! Enjoy!
Which Stamp Patterns are Available?
There are many stamp patterns available, however the most common patterns are:
Ashlar Slate, Large Ashlar Slate, Grand Ashlar Slate

Random Stone

London Cobble Stone, European Fan, Brick Herringbone

Square Tile (Large and Small)

The general rule of thumb when choosing a stamp pattern is; larger patterns to be used in larger wide open areas and smaller patterns to be used in smaller confined areas.
The reason for this is, if you were to use a smaller pattern on a large coverage area there would be too much detail and have a busy look to it. Conversely, using a larger stamp mat pattern on a smaller area (such as 3 foot wide sidewalk or smaller patio's) would not have enough detail to create an ambience.
Which Concrete Colors are Available?
There are over 60 different shades of color pigments which can be added to the concrete. the most popular being a slate grey, or a light brown. To note: The darker the shade which you choose, the more expensive the cost will be for the concrete mix. The reason is more pigment is used. If you select the lighter tones, which are closer to the tone of the concrete mix, the cost will be less.

Here are 2 different color charts available to download:
![]() Solomon ColorFlo Liquid Color Card
Solomon ColorFlo Liquid Color Card
![]() Davis Concrete Color Selector
Davis Concrete Color Selector
Which Powder Release Colors are Available?
There are many concrete powder pigment releases available. Just as with interior decorating, the rule of thumb is to select a release color which is in the same color family as the color used for the concrete mix, a shade or two darker. If you are more adventurous, we can use 2 or 3 different shades of release to create a marble type of effect with the color tones.

Some Samples of our Stamped Concrete Work


[ top of page ]
View Our Pages
- ¶ Home
- ¶ Stamped Concrete
- ¶ Smooth Finish
- ¶ Broom Finish
- ¶ Exposed Aggregate
- ¶ Concrete Crack Repair
- ¶ Retaining Walls
- ¶ Sealing & Maintenance
- » View Our Video Gallery
- » View Our Photo Gallery
- ¶ Asphalt Paving Service
Contact Us
Our Service Area
• North and West Vancouver
• Burnaby and New Westminster
• Coquitlam, Port Moody, PoCo
• Richmond and Tsawwassen
• Ladner and Delta
• Surrey and White Rock
• Langley and Abbotsford
• Pitt Meadows and Maple Ridge
• Chilliwack, Hope, Kamloops
• Whistler and Squamish
• Lions Bay and Sunshine Coast
• Vancouver Island
... and province wide